
BBQ Basics, Science & Fundamentals
How to Trim Meat for Better Bark (Beginner‑Proof Guide)
Jul
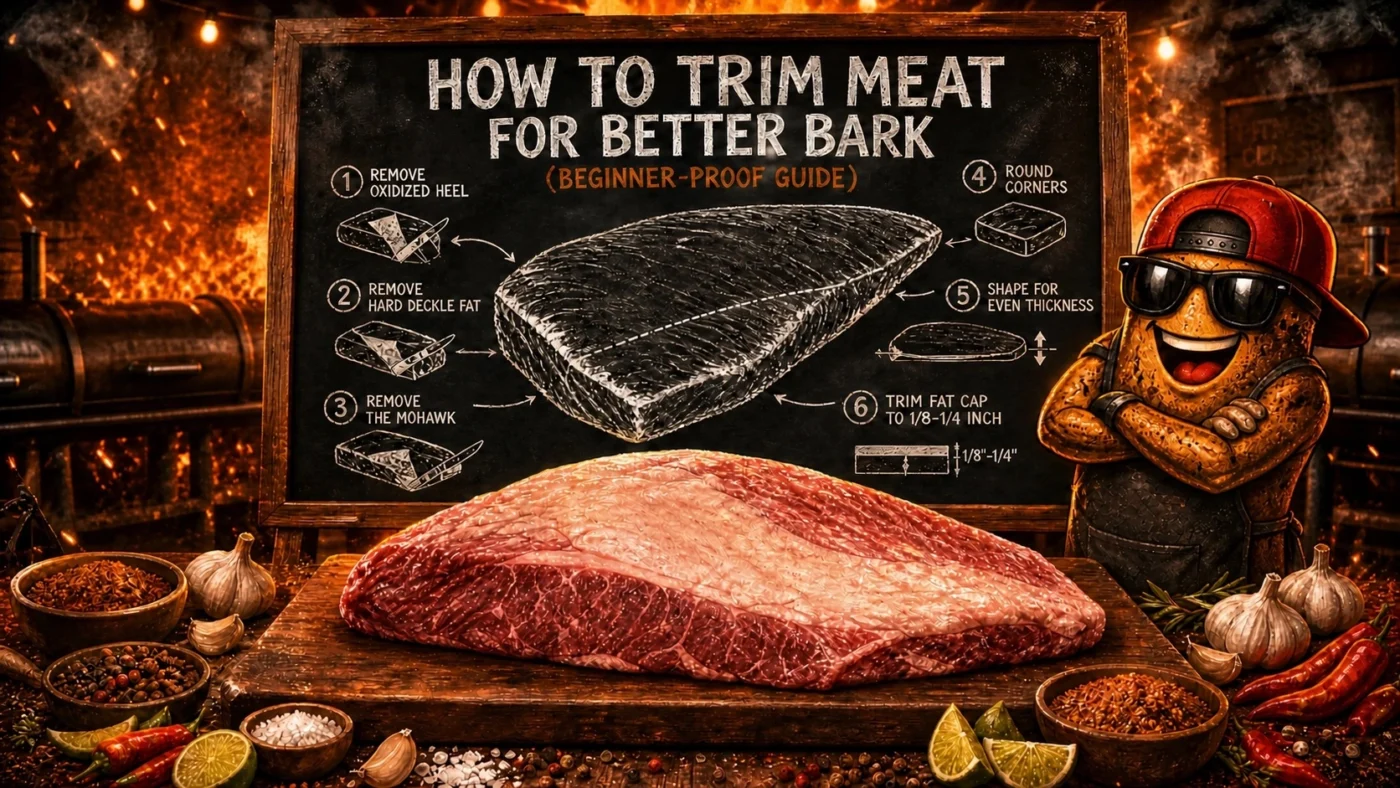
A good trim is the foundation of proper bark. If your brisket is shaped badly, your bark will always suffer. This guide shows you how to trim for bark, moisture and consistency using real pitmaster techniques.
How to Trim Meat for Better Bark (Beginner‑Proof Guide)
If your brisket is shaped poorly, your bark will always suffer. A thin flat dries out, an uneven fat cap stops seasoning from sticking and sharp edges burn before the rest of the meat is ready.
A proper trim sets up the whole cook. This guide walks you through how to shape a brisket for even cooking, better bark and more consistent results using techniques real pitmasters rely on.
For more on how bark forms, see Science Behind BBQ Bark.
🔥 What You’ll Learn Here
- Why trimming matters
- The six‑step trim
- How trimming improves bark
- Common trimming mistakes
- What to do with trimmings
- Final shape checklist
🔥 Why Trimming Matters More Than You Think
Brisket is made up of two muscles — the point, which is fatty and marbled, and the flat, which is lean and more fragile. They cook at different speeds, behave differently under heat and need shaping so they finish together.
When a brisket is left untrimmed, the same problems show up over and over:
- Thin flaps that burn and dry out
- Fat caps that are too thick to render properly
- Sharp edges that catch heat and burn
- Uneven thickness that leads to uneven cooking
- Fat pooling on the surface and stopping bark from forming
- Flats drying out before the point is finished
The fix is simple: shape the brisket so it cooks evenly. Trim for airflow, thickness and clean surfaces.
For more bark‑focused guidance, read How to Get Better Bark on BBQ.
🔥 The Six‑Step Trim for Better Bark
1. Remove the Oxidised Heel & Tendon
Along one side of the brisket you’ll find a strip of darker, oxidised meat and tough connective tissue. Leaving it on gives you chewy slices and patchy bark.
- Bark will not form properly on oxidised meat
- The tendon blocks seasoning from getting into the meat
Technique: Use the tip of your knife and follow the natural seam to lift out the oxidised strip. Aim for clean, fresh meat underneath.
2. Take Out the Hard Deckle Fat (Without Digging a Hole)
The deckle is the hard, waxy lump of fat between the point and the flat. It does not render during the cook and can create pockets where heat and smoke do not flow properly.
- Hard fat blocks heat and airflow
- Creates pools that stop bark forming
- Digging too deep ruins the shape of your slices
Technique: Angle your knife and shave the hard fat away in thin passes rather than scooping. Stop when the fat feels softer and more even.
3. Remove the Mohawk (The Tall Front Hump)
Many briskets have a tall, thin flap at the front that sticks up like a mohawk. It burns quickly, curls up and casts a shadow over the meat underneath.
- Creates a shadow zone where bark will not set
- Dries out almost instantly
Technique: Cut straight down to remove the tall flap, then shape the remaining fat at roughly a 45° angle so it tapers smoothly into the rest of the brisket.
4. Round Every Sharp Corner
Square edges and sharp corners catch direct heat. They burn, dry out and look rough on the cutting board.
- Rounded edges improve airflow around the brisket
- Better airflow helps bark form evenly
- No burnt tips on the finished slices
Technique: Use a three‑cut method.
Cut off the main corner, trim the small corners that remain, then smooth the curve so the brisket looks rounded and aerodynamic.
5. Shape the Brisket for Even Thickness (Especially the Flat)
This is the most important step for beginners and the one that most affects bark and moisture.
- The flat dries out because it is too thin
- The point cooks slower because it is thicker and carries more fat
- Both muscles need to finish at the same time for even cooking and proper bark
Technique: Find the thinnest part of the flat. Trim the opposite side and any thicker sections until the flat sits at roughly ½–1 inch thick across its length. Aim for smooth, gradual transitions rather than sudden steps.
6. Trim the Fat Cap to ⅛–¼ Inch
A fat cap that is too thick will not render and can block seasoning. A fat cap that is too thin leaves the flat exposed and dry.
- Bark forms on meat, not on thick fat
- You need just enough fat to shield the flat
- Even thickness gives even rendering
Technique: Use the finger rake test.
Place your thumb and index finger together as if you are about to pinch something. Drag that pinch lightly sideways across the fat cap.
Your fingers will naturally dip into a shallow groove. That groove is the right fat thickness — around ⅛–¼ inch.
Anything sitting higher than that dip is excess fat. Shave off the raised areas until the whole surface matches the depth your fingers settled into.
🔥 How This Trim Improves Bark
When briskets are trimmed poorly, the same bark issues show up again and again:
- Not enough pepper sticking to the meat
- Too much moisture trapped around the brisket
- Water pans and pooled fat stopping bark from forming
- Wrapping too early before bark has set
- Edges burning before the rest of the bark is ready
A good trim helps solve all of these:
- Better airflow → better bark
- Cleaner surfaces for seasoning → better bark
- More even thickness → more controlled moisture loss
- More predictable cook timing → more consistent bark
For deeper bark science, see Science Behind BBQ Bark.
🔥 Common Mistakes That Kill Bark
- Leaving the mohawk on
- Leaving sharp corners and thin flaps
- Leaving a thick, uneven fat cap
- Leaving silver skin on the surface
- Skipping trimming to “save meat”
- Wrapping too early before bark has set
- Cooking at very low temperatures for too long
- Using sugary rubs at high heat
- Using a water pan in a pellet smoker when it is not needed
🔥 What to Do With the Trimmings
- Grind them for burgers
- Use them in sausage
- Render tallow for future cooks
- Add trimmed meat and fat to beans
- Freeze trimmings for stock, stews or future barbecue
🔥 Final Shape Checklist
Your brisket is trimmed properly when:
- The flat is an even thickness
- The point is rounded and flows smoothly into the flat
- The mohawk and tall flaps are gone
- The fat cap sits at roughly ⅛–¼ inch
- All corners are rounded
- No silver skin remains on the surface
- No hard deckle fat remains
- No thin, stray flaps of meat remain
- The brisket looks smooth, tapered and aerodynamic
Complete Guide to Outback Smoke and Fire BBQ Rubs →
🔥 Frequently Asked Questions
Does trimming really affect bark?
Yes. Bark forms on clean, even, properly shaped meat, not on oxidised surfaces, loose flaps or thick, unrendered fat.
How thin should the flat be?
Aim for roughly ½–1 inch thick across the length of the flat so it cooks evenly and holds moisture.
How much fat should I leave on?
About ⅛–¼ inch across the fat cap. Enough to protect the flat, not enough to block seasoning or stop rendering.
Should beginners remove the mohawk?
Yes. It burns quickly, curls up and stops bark forming properly on the meat underneath.